Wednesday, May 27, 2015

Final Movie: Part Two - Adobe Flash

I always had the idea in the back burner to mix media, and I felt this project would be the right time to display my skills. I've been using Adobe Flash Professional CS5 for about 4 years now, and I wanted to combine 2-D and 3-D animation.


Because key framing is very crucial for animation, key framing in Flash and in Maya are done pretty similarly. The main difference is that in Maya, you have to create models, which then have to rigged in order to be animated, while in Flash, you have to draw things in layers and each layer then has to be animated. For example, in the picture above, each of the girl's arms, her head and her torso are on different layers.


Once I finished the Maya and Flash portions, I quickly threw the two files together in Windows Movie Maker to add the sound effects and voila!


Final Movie: Part One - Maya

This project started out and wanted to be a lot of different things, but in the end, this small animated short is comprised of three different programs: Autodesk Maya 2015, Adobe Flash Professional CS5, and Windows Movie Maker (Trust me, I really wish I had a better video editor.)

So with that in mind, I will split this blog into three separate sections so it doesn't get too crowded with information.


I started out using one of the pre-rigged models from http://www.cgmeetup.net/home/ultimate-rigs-maya-rigs-maya-character-rigs-free-maya-rigs/ and created a NURBS plane. I originally wanted the subject to be a cow and the location to be out in a field/on a farm to fit the theme of UFO invasions with farms and crop circles and such. However, do to complications regarding a rig of a cow and background images, I altered my idea, but still kept the general idea.


Because (thankfully) of the "Animate a Rig" assignment, I already had a decent amount of experience with this rig. I also decided it would be cool to play with a darker atmosphere (which is also easier, so hurray for that) and then contrast it with the other half of the short.


I also learned a lot about how to use a camera and lights. The camera is a pretty big "character" in the short and I had a lot of fun playing with it. I really like dynamic camera angles and I only hope to improve my technique. Overall, it could use improvement, but I'm happy with how the Maya portion turned out.

Monday, May 18, 2015

Assignment 4 - Animated a Rigged Model

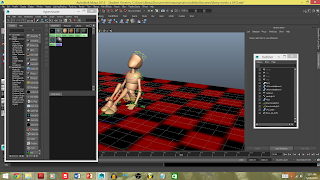
So after finding a bunch of free rigs to download, I decided to humor myself and make the big, beefy guy dance.

Rigs can be found here: http://www.cgmeetup.net/home/ultimate-rigs-maya-rigs-maya-character-rigs-free-maya-rigs/

After unzipping and opening the file, I started him leaning to the side, but still at a semi-neutral position. The goal is to have him kick his leg out a few times, jump to his other leg, have him kick his other leg a few times, and have him jump back to the starting position. I also created a NURBS plane as a floor so I could get used to having a model/rig move without having it clip through the floor too much.

Much like this.

The key things I learned from this was how to control a pre-rigged model and how to make actually animate in Maya. Fortunately, my experience in Adobe Flash Pro has already had me used to key framing, so once I got the hang of how to key frame in Maya, it basically became second nature.

The hardest thing was probably keeping track of all the body parts of the rig. Fortunately I was going for a more cartoon-like movement, so exaggeration of the limbs was acceptable. Even so, things clip and distort so easily. Also making the movements flow naturally was difficult, but I eventually came to a product I liked.


Wednesday, March 11, 2015

Assignment 3: Brita Water Bottle


This assignment makes use of CVs and curving, as well as improving my usage of NURBS shapes. I figured my refillable water bottle would be the perfect candidate for this assignment, seeing that the bottle is mostly made of subtle curves. Most of the model is made out of NURBS cylinders, with the exception being the handle of the bottle, which was created using a NURBS torus.


When starting out with my first/main cylinder, I knew I would have to manipulate CVs in order to get the shape of the bottle to look right. Otherwise it would resemble a Red Bull can or something along those lines. I also added one or two isoparms to make the curvature more natural. Finally I curved the ends of the cylinder inwards to better match the bottle, the top especially because it then has to connect to the cap of the bottle.


The most difficult part of the model was definitely the handle. Because of its awkwardly floppy nature, I would really have to influence the CVs to make it look as if it were slouching over the bottle. I got it to look alright for the most part, but part of the torus is clipping through the main part of the bottle, and the widths of certain sections of the handle are a little off. Overall, the handle looks awkward and floppy, which is exactly what I wanted. Finally we have the mouth piece of the cap. All it took was a few NURBS cylinders and pullings of CVs to get the shapes I wanted. I also added a few very flat NURBS cylinders and a sphere on the very top of the cap to show where the cap would open and close.

 I'm pretty happy with how this turned out and I might try to animate the bottle opening sometime in the future.

Assignment 2: Bouncing Ball Tutorial


This assignment is mostly learning about how to make use of Maya's lighting, coloring, shading, and rendering capabilities, as well as focusing a bit more on animation, rather than modeling. The ball and ring were made from a NURBS sphere and torus, respectively. The floor was made from a NURBS plane. Afterwards, textures and coloring from Hypershade were used to decorate the ball, ring, and floor.


The objective was to make the ball bounce through the ring and across the screen, though instead of statically bouncing, I decided to play around with the stretching and the physics of the ball. That way, the ball has a bit more personality to it and, ultimately, makes the animation a bit more fun to watch.

Wednesday, February 18, 2015

Assignment 1: 3D Model (Table with Flower & Vase)


This is the start of my time using Maya. Obviously, I'm still learning a lot of the basics, but I wanted to demonstrate a little complexity in my model.


For the face of the table, I created a NURBS cylinder and scaled it down to become more flat and wide. Then for the legs, I created NURBS cube and scaled it to become a vertical rectangle. Afterwards, I simply copy and pasted the table leg three times and moved them to where the "corners" of the table would be located.


I'll admit, I felt a little guilty just making the table. It seemed a little too easy, even for someone like me who had never used Maya before. So I decided to add a vase with a flower on top of the table. For the vase I created a NURBS sphere and a NURBs cylinder without bases on either side. Otherwise, the flower would look like it would be going through a solid object, and that wouldn't be good. Then I moved the cylinder on top of the sphere to complete my vase. (Hey, future Beau here. After learning how to use the CV Curve tool, I realize how much simpler it is to create a better looking vase. Oh well, a first attempt is a first attempt.) 
The flower was an entirely different project all together. I based the flower as a hybrid of a sunflower and a daisy for simplicity. I created the incredibly thin stem by creating a NURBS sphere and slimming it down a lot. The good thing about the stem is that the oval like ends of the stem can be hidden in the flower and the vase, just leaving the slim stem. As for the rest of the flower, the petals are made from flattened NURBS spheres.The center is a NURBS cone and then I moved the petals to the center of the flower. The difficult part was having the petals on the same plane as the cone, mainly because this was before I really knew about the other 3 viewing perspectives.

Overall, for a novice Maya user, I think it looks pretty good. I still have a lot to learn and I look forward to it.